How to successfully begin your IEEE WebEx session
Webex Meeting Request Instructions:
There are a few easy steps to this process, and the order of these steps must be followed to replicate success each time.
Step 1: Click on the WebEx meeting link. This link is provided to you once your requested meeting has been created. The link will look similar to this: https://ieeemeetings.webex.com/ieeemeetings/j.php?ED=#########&UID=#########&RT=MiMxMQ%3D%3D =
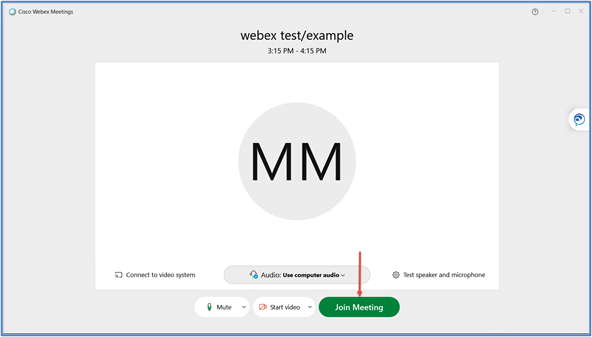
Step 2: You will have to join the meeting as a participant. (Your Webex session will not be available to open until 15 minutes before scheduled starting time.)
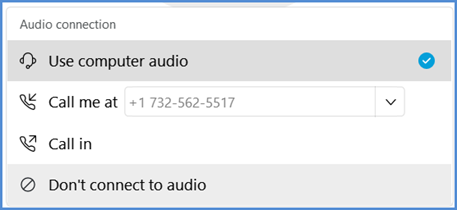
Step 3: On the join screen you have the option of selecting your Audio preference.
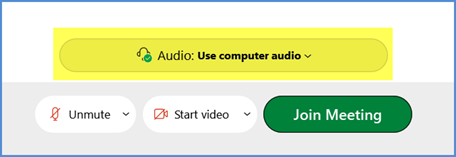
You can choose Computer or Call in (call back feature is not enabled)
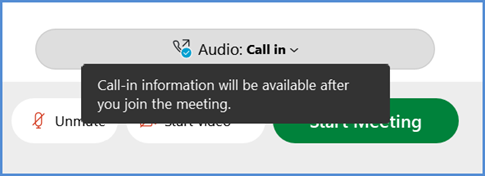
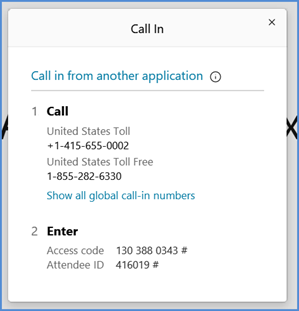
If selecting Call in, Webex will prompt you “once you join the meeting.”
You can now Join the meeting as a participant.
Step 4: The Webex application will launch, and you will be notified that the host has not yet joined the meeting.
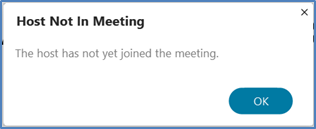
Click OK.
Step 5: If you have selected to Call in, Webex will now prompt you with the call in information.
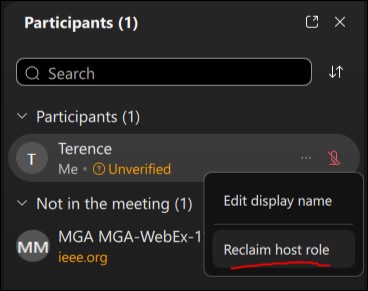
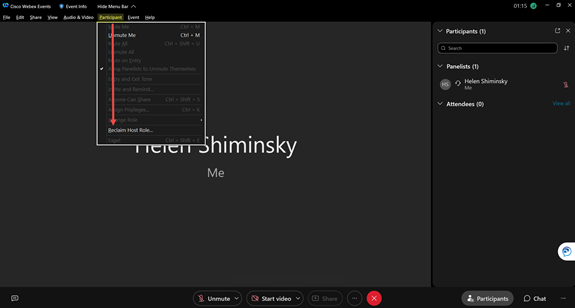
Step 6: To claim Host privileges, click on the “Participant” button at the bottom right of the window.

Step 7: Click on the three (3) dots next to your name.
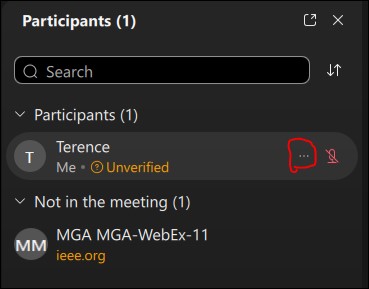
Step 8: Click on “Reclaim host role.”
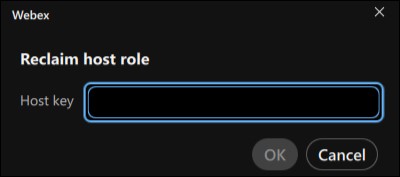
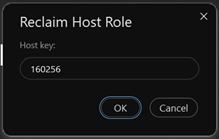
Step 9: A window will open and will prompt you for the host key. If you are the meeting requester, you will have been given this key.
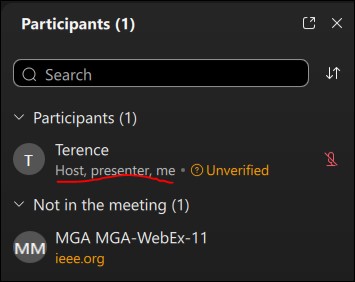
Step 10:Once you’ve reclaimed the host role, your name will then have “(Host)” written next to it.
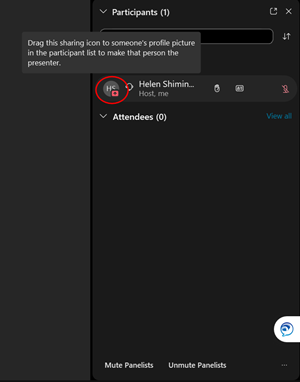
When the Participants Window is opened, you will see a Globe next to the Presenters name.
To change the presenter, drag the Globe from your/the presenters name to the new presenter.
You will then be prompted to confirm this change. Select “Yes”
As Presenter – you also have the option of Muting “All” Participants.
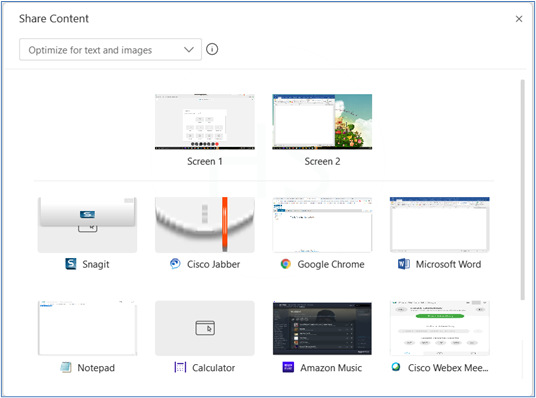
Step 11: To Share your Content/Screens, etc. Select the “Share” on the bottom center icon list.

The Share Content Screen selection will appear. You can choose to select a specific Screen or Program. Once chosen, that screen or program will open.
You can choose to stop sharing your screen at any time using the floating top bar.

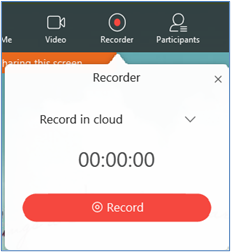
Step 12: Record your meeting
From the floating bar you can also select to start recording your meeting.

To start recording, select Recorder
It will show “Record in Cloud” – Click on the red Record button
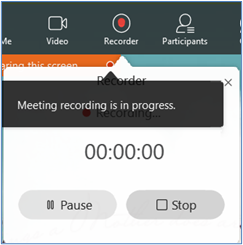
Step 11b: Pause or Stop the recording at any time by selecting the Recorder button again. If you stop and then restart the meeting, it will record as two separate files. Use pause to maintain one file.
Once the meeting has ended, contact IEEE staff to obtain a link for your webex recording. We will then provide you with the information as soon as it is available.
Webex Webinar Request Instructions:
There are a few easy steps to this new process, and the order of these steps must be followed to replicate success each time.
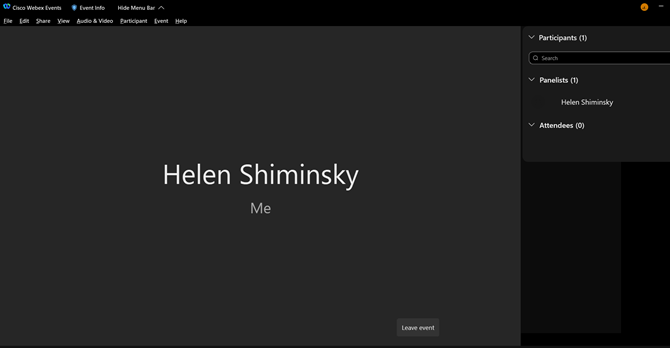
Step 1: If you have requested the Webex Event option, you will be setup as a Presenter/Panelist. The same link is used for both Attendees and Panelist.
To start Event, click on the WebEx link provided to you. This will be sent to the requestor once your event has been created.
The link will look similar to this:
| Event address for attendees: https://ieeemeetings.webex.com/ieeemeetings/onstage/g.php?MTID=e92b74135e641f86c0499ef85772c9c1f |
Step 2: You will join the meeting as an attendee. (Your webex session will not be available to open until at least 15 minutes before scheduled starting time.)
When you click on the link provided, Webex will recognize you as a Panelist. You will need to enter the Panelist password which will be provided in the Webex setup sent you.

Step 3: On the next screen, select Join event.
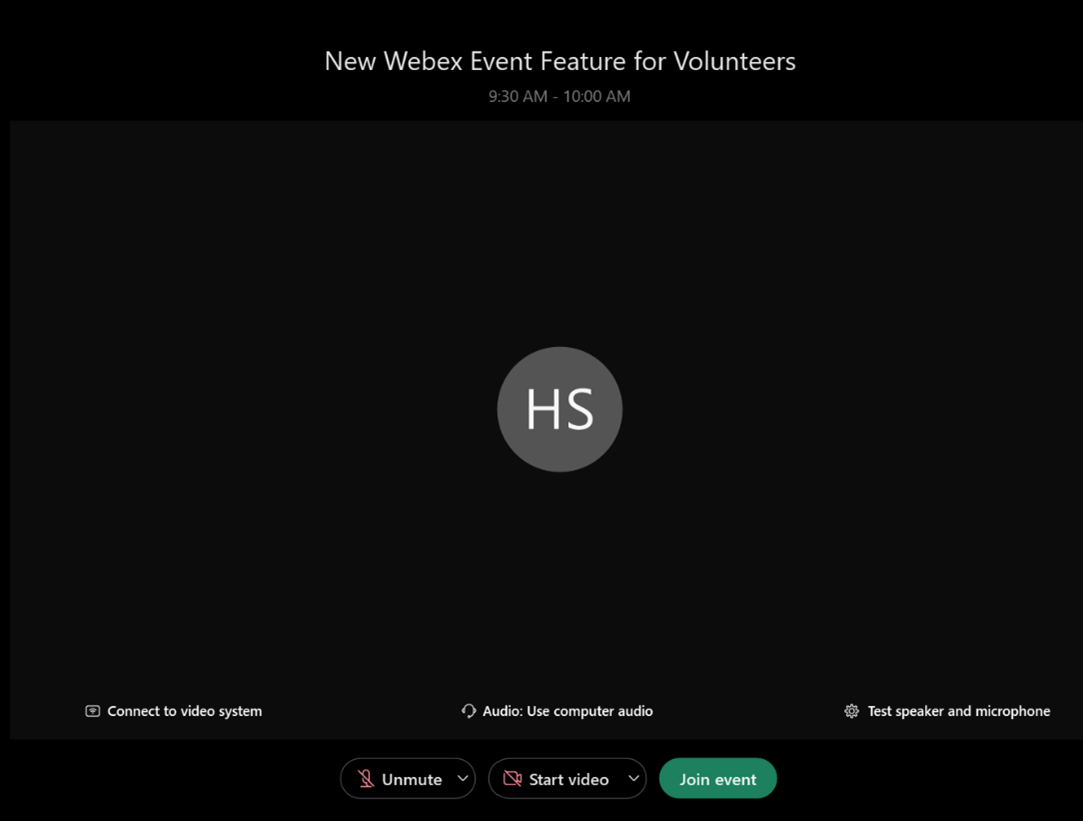
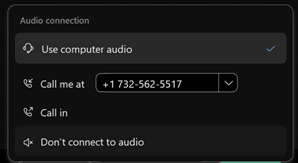
Using “Audio” you can select audio option for you.

You can choose Computer or Call in (call back feature is not enabled)
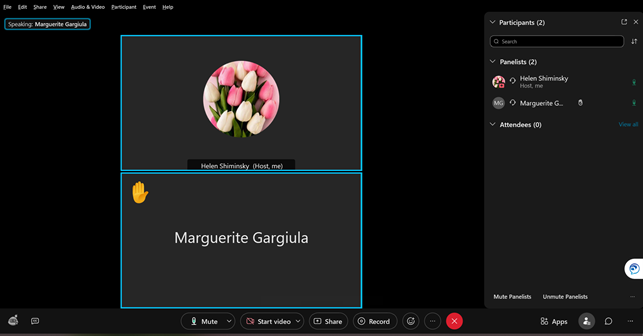
Once you Join the Event, you will show as a Panelist.
Step 4: Webex will notify you that the Host has not yet joined the meeting.
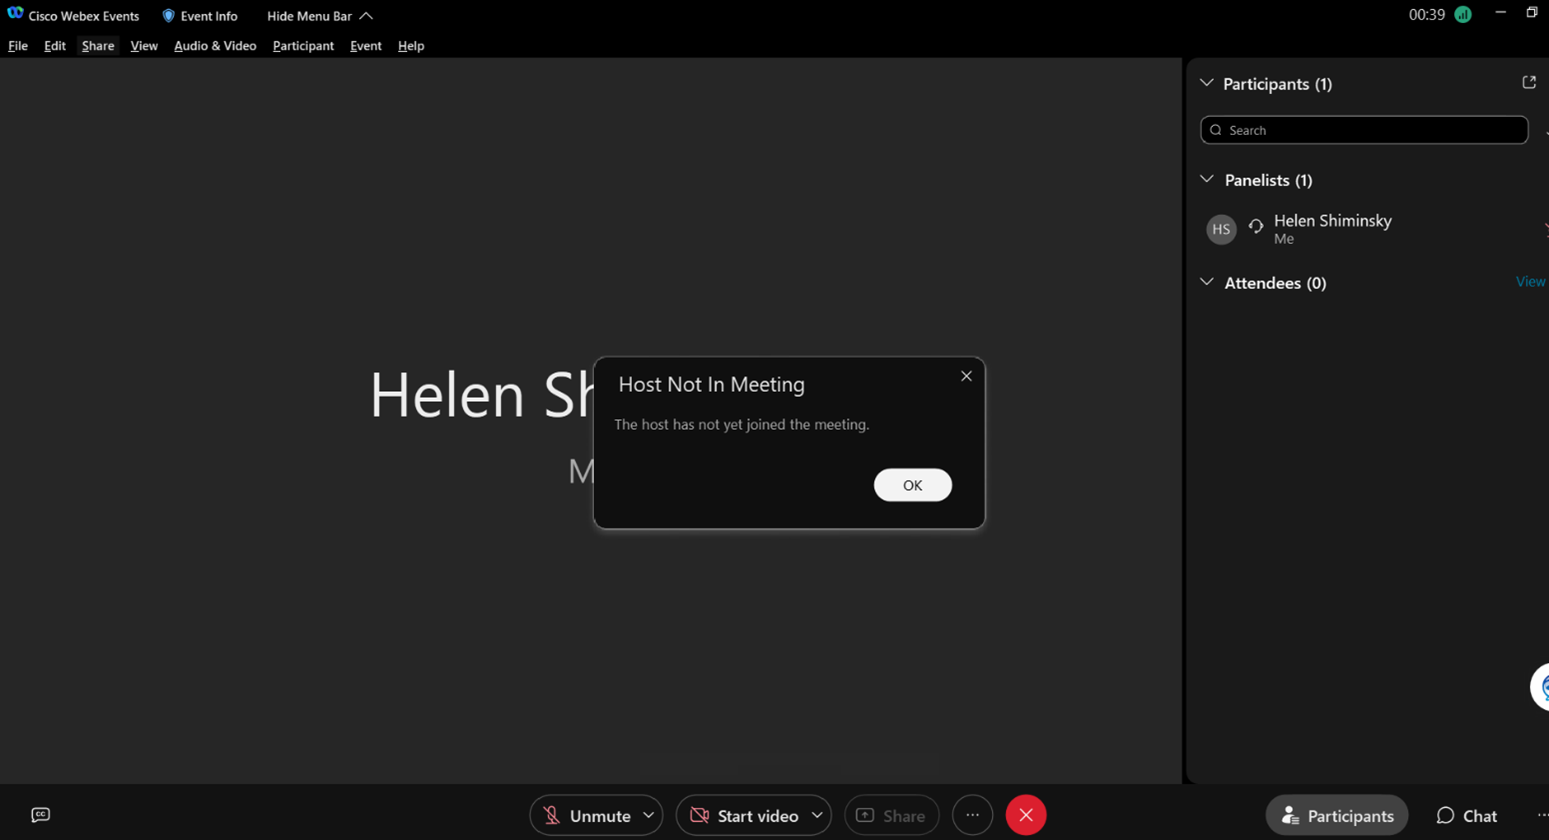
Select OK
You will now need to Reclaim the Host Key.
Step 5: Reclaim the Host Key: Click on Participant on the upper menu bar. Select “Reclaim Host Role”.
If you are the meeting requester, you will have been sent this code. Enter Host Role Key and select OK.
Once you’ve reclaimed the host role, your name will then have “(Host)” in the window.

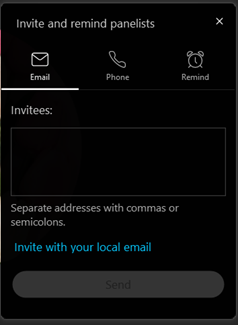
Step 6: Once you are the host, you can invite a Panelist (if they have not joined) using the more options menu.
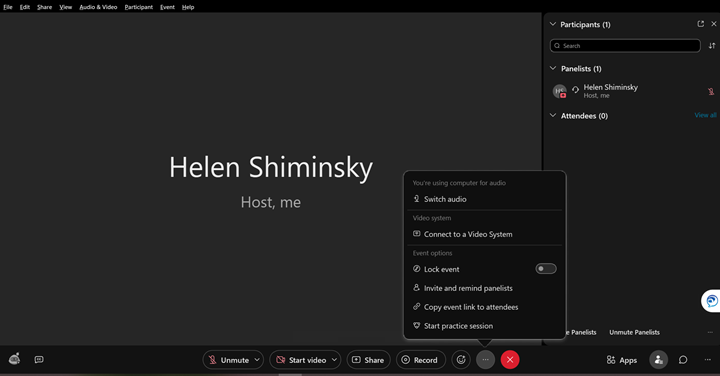
Or, they have already joined the Event as an Attendee, you can elevate them as a Panelist. Find their names under the attendees list. Right click on their names to open selection. Select “Make Panelist”. (Remember to select “Mute” or “Unmute” Panelists on the bottom of the Attendees Screen as required.)

Once upgrade has completed, the new panelist’s name will appear in the Panelists area.
Step 7: To Share Screen and Record, please follow from Step 10 (page 5) on Meetings instructions.
Other Features:

As in Meetings, Host and Panelists need to “Drag” Sharing Icon to make that person the presenter.
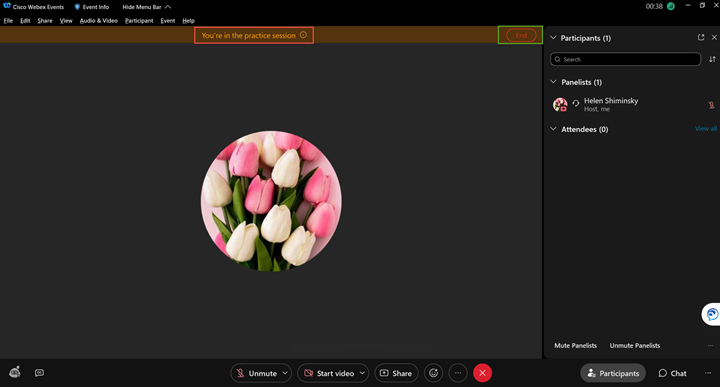
Optional “Practice Session”
If requested in “Comments” area of Webex Request Form, Events (Only) can be coded to open up to 60 minutes before the Scheduled Start Time in order to have a “Practice Session”.
Click on “more Options” and select Practice Session.

While in Practice Mode, it will show in the upper area of screen. When completed, click on “End”