This new workflow was deployed to vTools Events on Thursday 2 October.
In an effort to reduce the number of event co-hosts being added without permission, the vTools Team has implemented a workflow that allows event creators to send a URL for prospective co-hosts to add themselves to an event, thus providing approval of their addition as a co-host for the event.
This new workflow also allows the primary host to control who can manage the event – so if there are any co-hosts that you want to list but do not want them to have “edit” access to the event, you can check or un-check that box accordingly.
Note: For now, the existing process of direct-adding co-hosts will still be in place. However, we encourage volunteers to use the new workflow as much as possible going forward.
To use this new workflow, follow these steps:
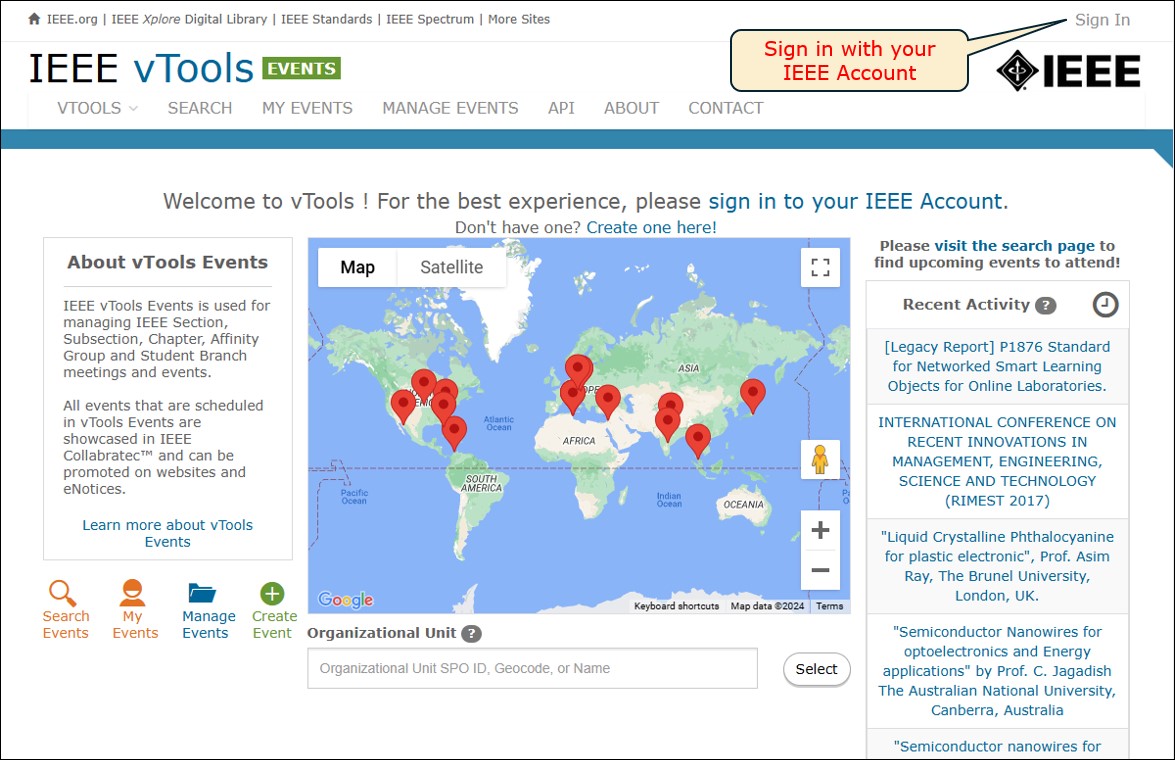
1) Sign in to vTools Events with your IEEE Account.
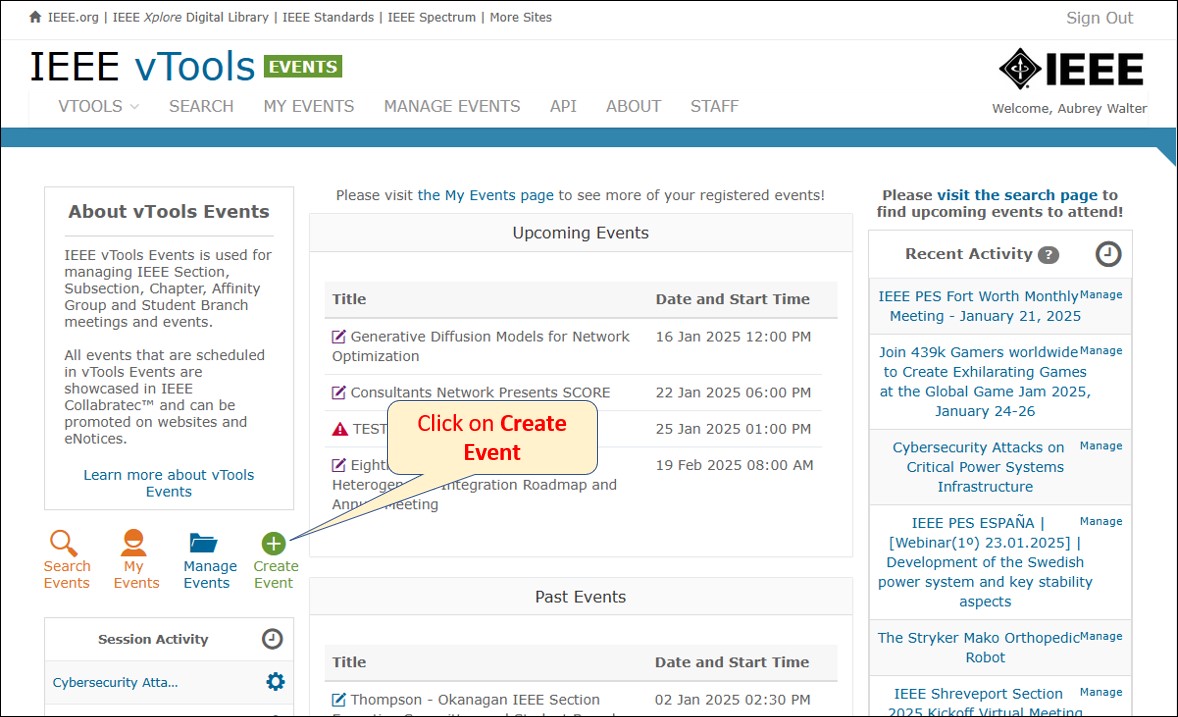
2) Click on “Create Event” to create a new event.
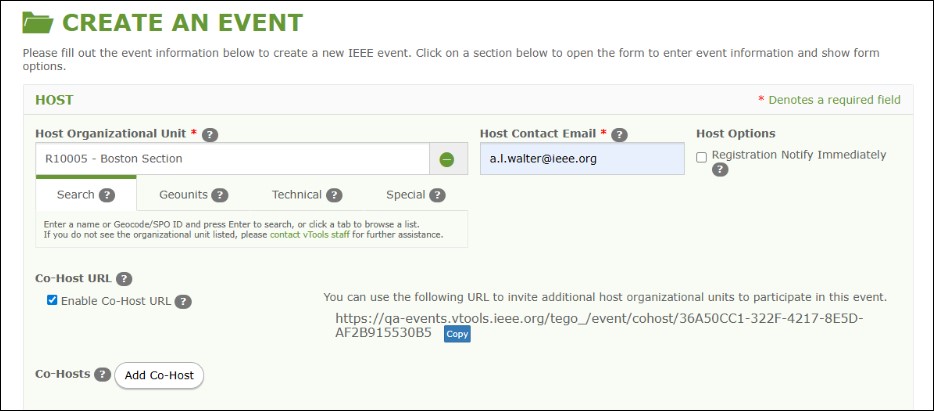
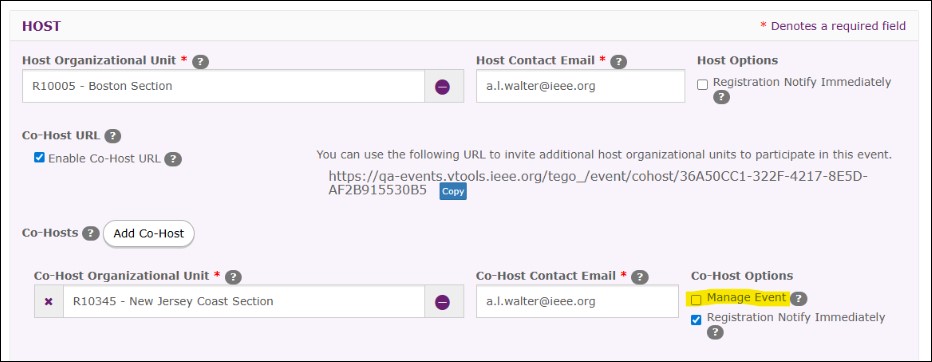
3) Add your primary host, as you normally would – you will only be able to add OUs for which you are a current officer.
4) Instead of clicking the “Add Co-Host” button, click the checkbox to “Enable Co-Host URL.”
5) This will generate a URL that you can then copy to send via email or other method to other volunteers from other OUs that you would like to add as co-hosts – more on this in Step 7.
6) Continue with the setup of the rest of your event, just as you normally would.
- If you want to save it as a draft while you wait for other co-hosts to add themselves, click “Save as Draft.”
- If you want to publish the event, click “Save & Publish.”
- Co-hosts can be added whether the event is in draft or published.

7) When you send the copied URL to the other volunteers, they will click the link and will be brought to a modified/limited view of the event you have created. They will be asked to sign in with their IEEE Account.

8) They can then add their own OU(s) as a co-host and enter the contact email address. They can also opt in to receiving notifications when someone registers for the event.
- The user can add as many co-hosts as they like, but again, will only be able to add OUs for which they are a current officer!

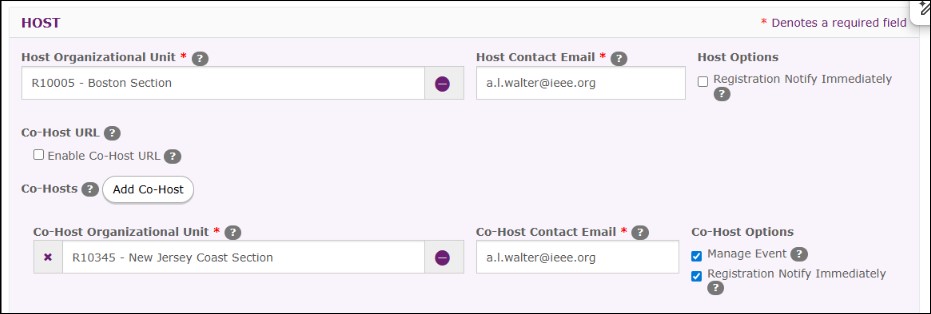
9) No other actions will be available to the co-host(s) unless and until you as the primary host/creator of the event enable them to manage the event.
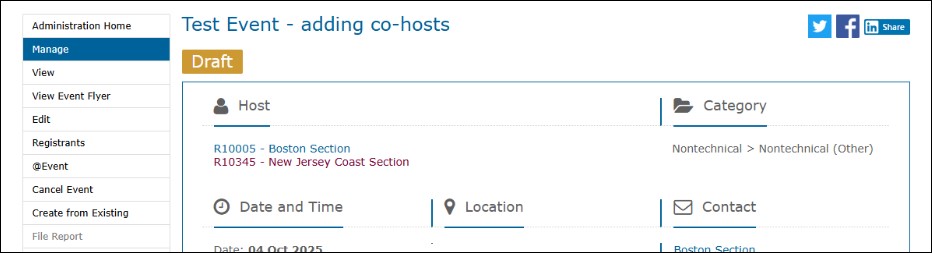
- On the Manage screen, you will see that the newly added co-host is marked in red meaning they do not currently have access to edit or manage the event.
10) To enable them to manage the event, go to “Edit” and click the checkbox next to “Manage Event”
11) You can save as draft again if you are not ready to publish, or, you can save and publish at this point.
12) Back on the Manage screen, you will see now that the co-host is marked in green signifying that they have edit access to the event.
13) Even if the event is published, other co-hosts can still be added by anyone with whom you have shared the URL.
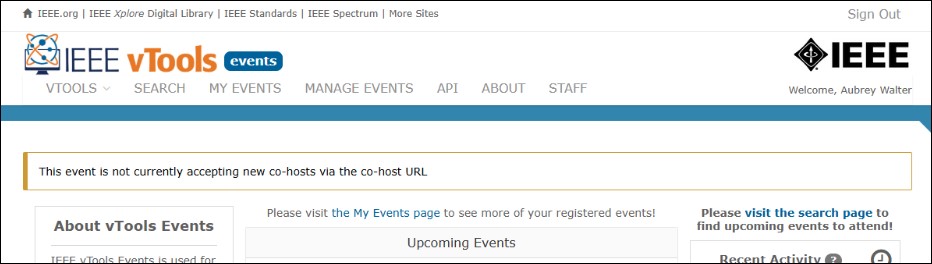
14) To disable the adding of co-hosts, simply go back to “Edit” and uncheck the “Enable Co-Host URL.”
- No other co-hosts may be added at this point.
- If the enable cohost checkbox has been unchecked by the primary host, then anyone who tries to add themselves will be redirected to the public view page for the event, with a message: “This event is not currently accepting new co-hosts.”
15) If you want to re-enable adding co-hosts, simply go back and re-check the box.
16) You may continue with the event set up as you normally would, and save & publish whenever you’re ready.