WebInABox allows you to create simple websites for your Organizational Unit (OU) using a step-by-step template.
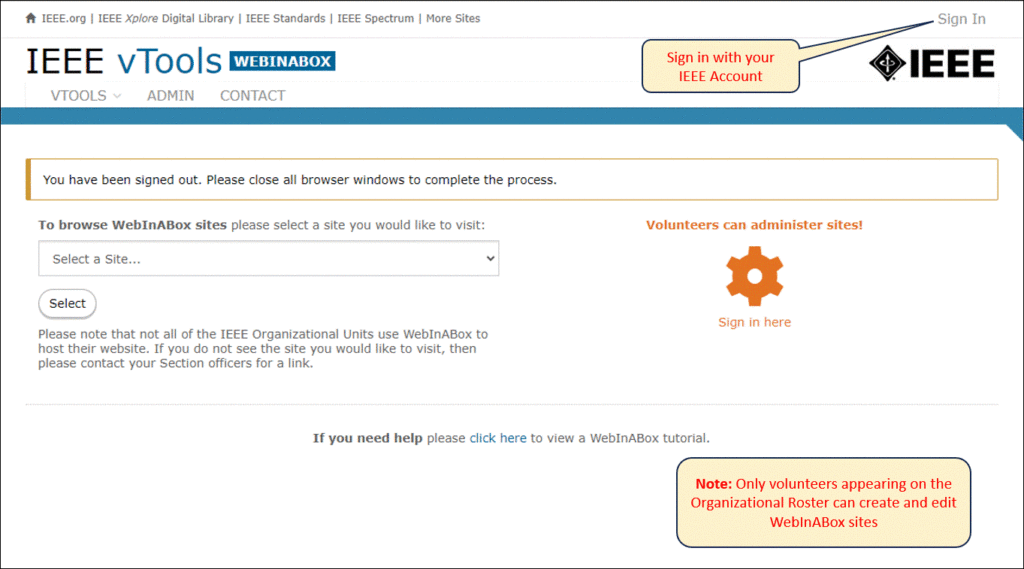
Note: Only volunteers appearing on the Organizational Roster can create and edit WebInABox sites.
Create a New Site
Sign in to WebInABox with your IEEE Account.
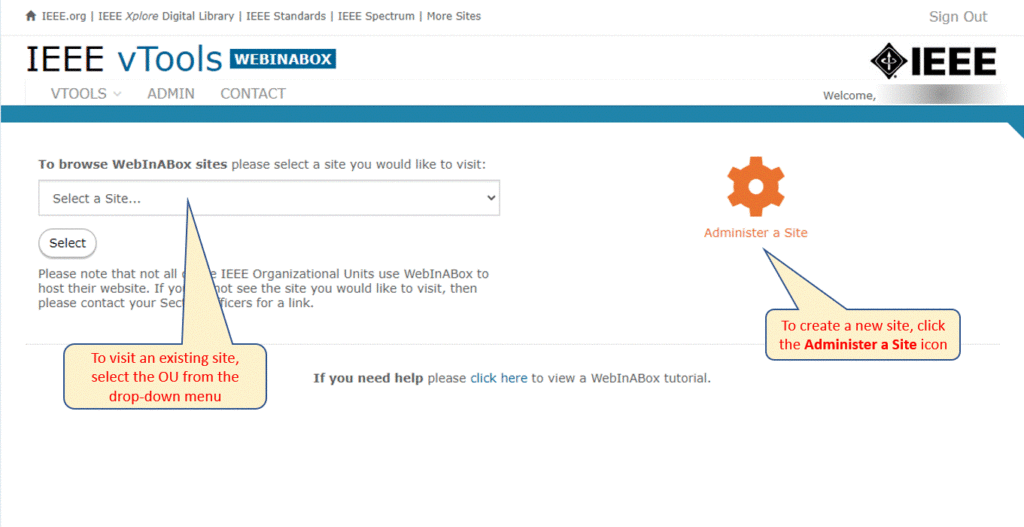
Click Administer a Site
To view other WebInABox sites, select the OU from the list of sites.
Select Your OU
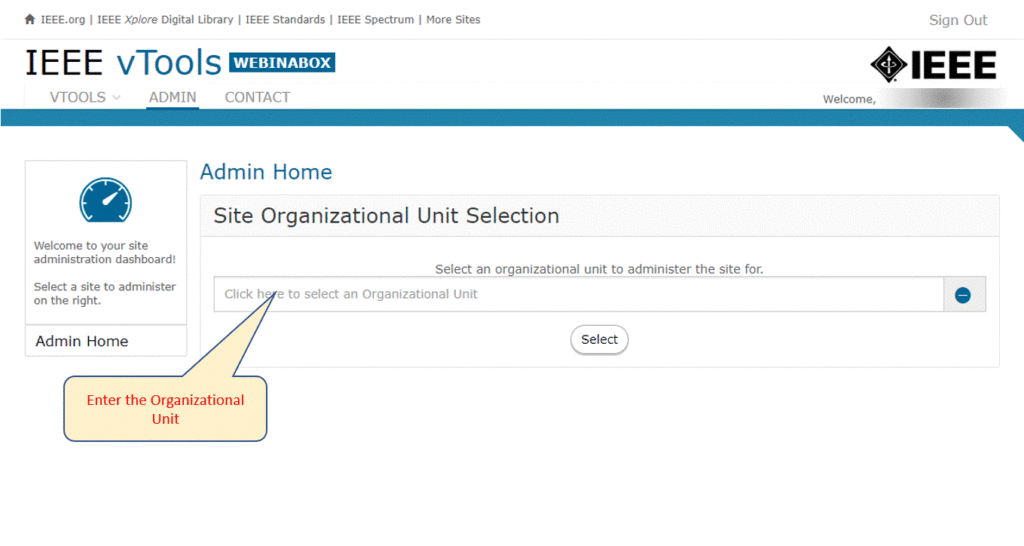
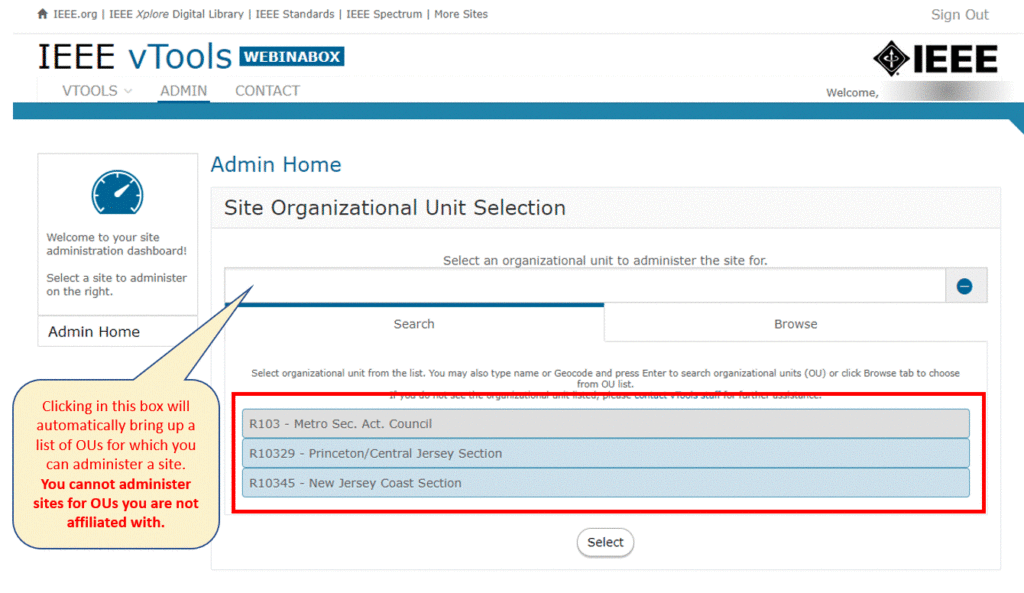
Click “Select” to begin creating the new site. Note: If a site already exists for the OU you select, it will bring you to the “Edit” screen for the site. See below for instructions on editing an existing site.
Begin Creating Your Site
Home Page
The screen should now show that you are creating a new site:
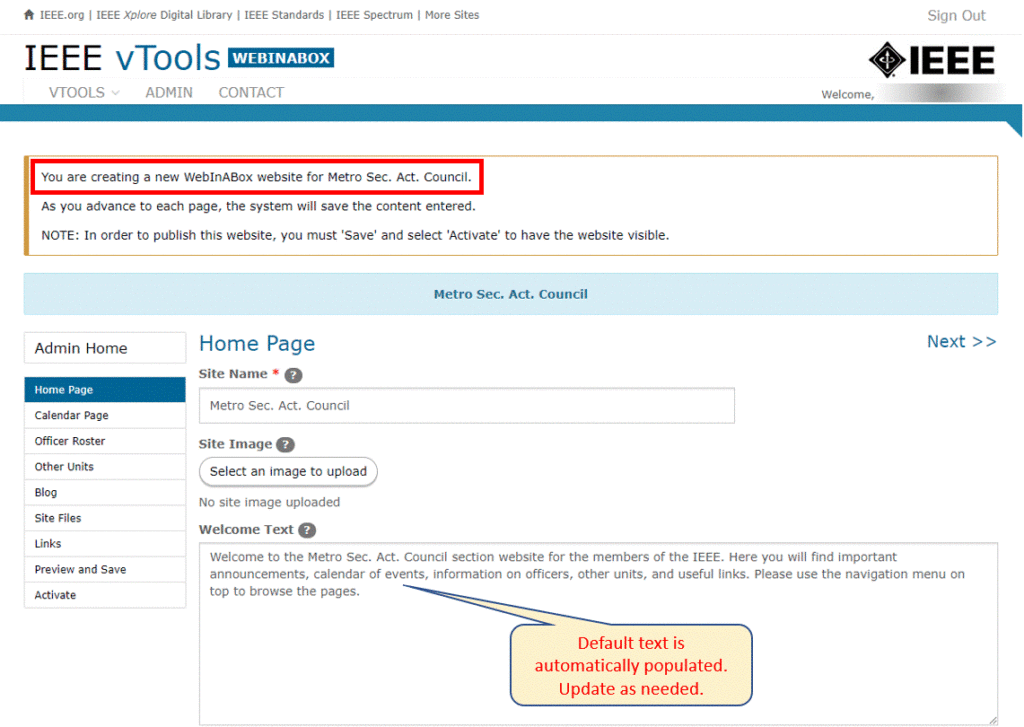
Make any necessary edits on this page, including changing your site name, uploading an image, and updating the default Welcome Text.
You can also add announcements on this screen:
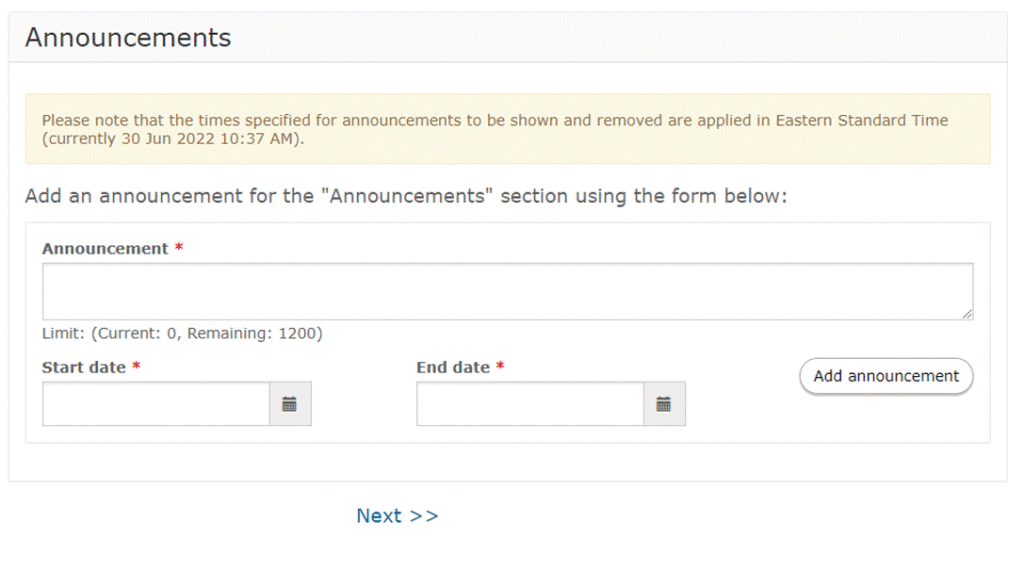
Click “Next >>” to advance to the next screen.
Calendar Page
Here, you can choose to show a calendar of events from vTools Events that are related to your OU. This can be generated by an automated feed.
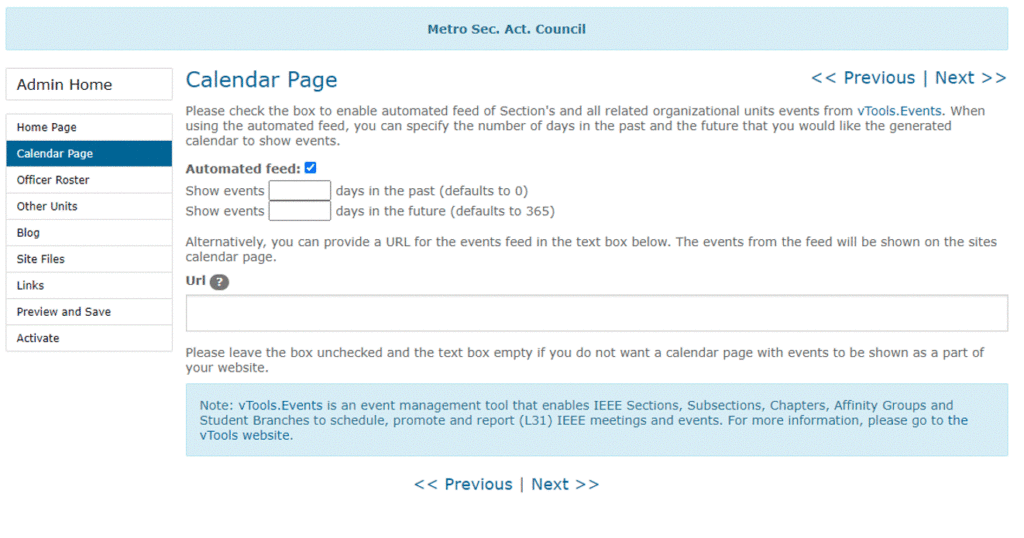
Click “Next >>” to advance to the next screen.
Officer Roster Page
Here, you can select to show Officers as reported to IEEE Headquarters. The list of designations (Positions) will show on this page. Select and un-select as desired.
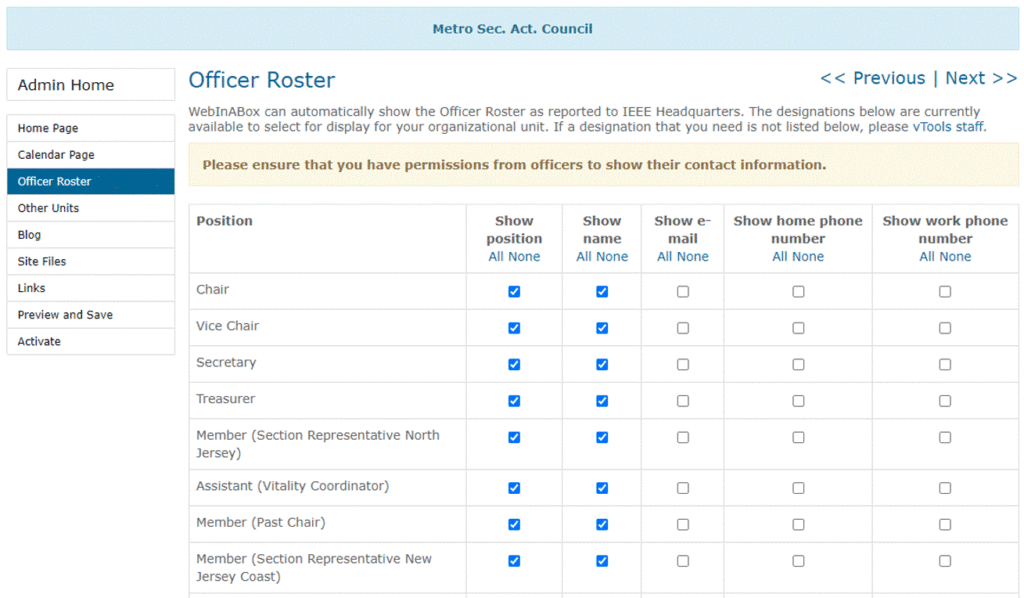
Click “Next >>” to advance to the next screen.
Other Units Page
Here, you can choose to display a list of other units related to this OU. You can also add any additional OUs at the form at the bottom of the page.
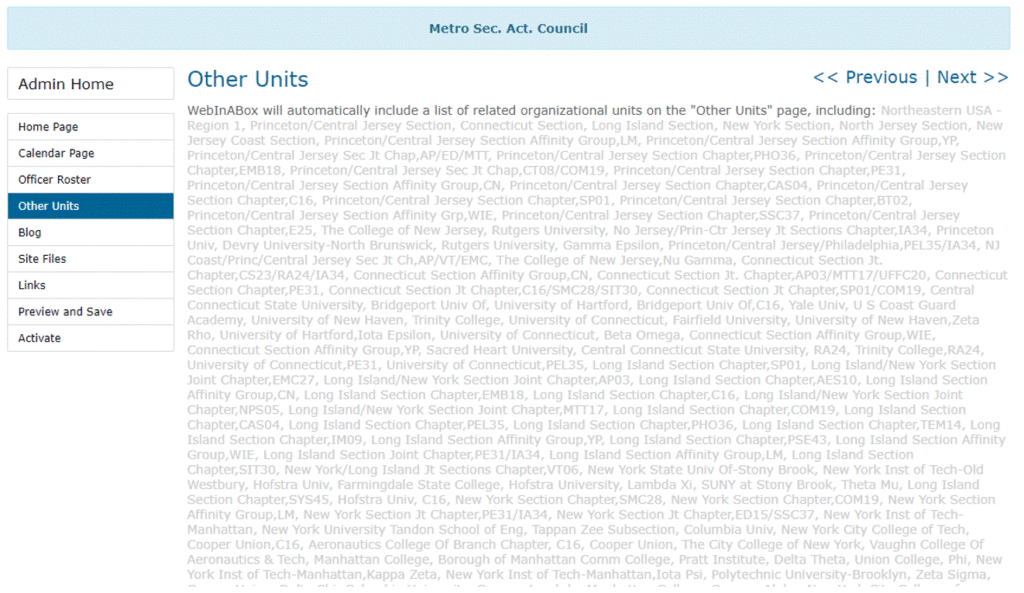
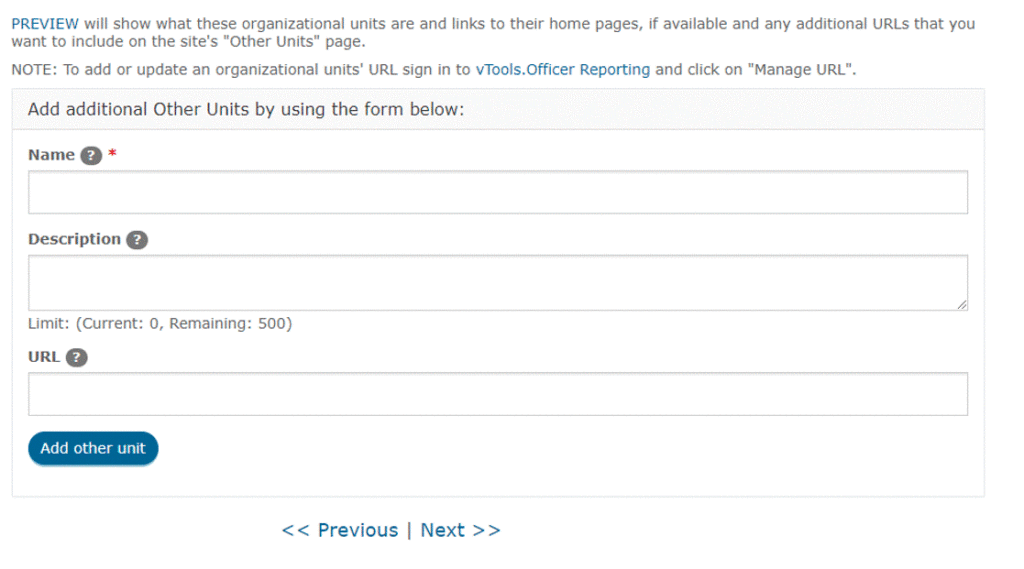
Click “Next >>” to advance to the next screen.
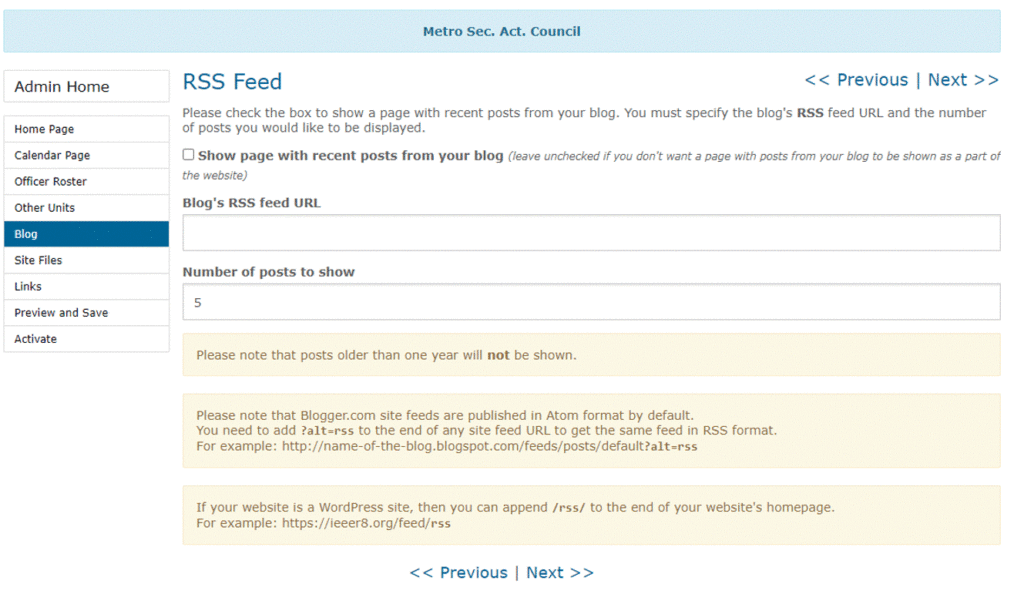
Blog Page
Here you can select to show recent posts from your blog (if applicable).
Site Files Page
Here you can upload files to be made available for download to those who visit your site.
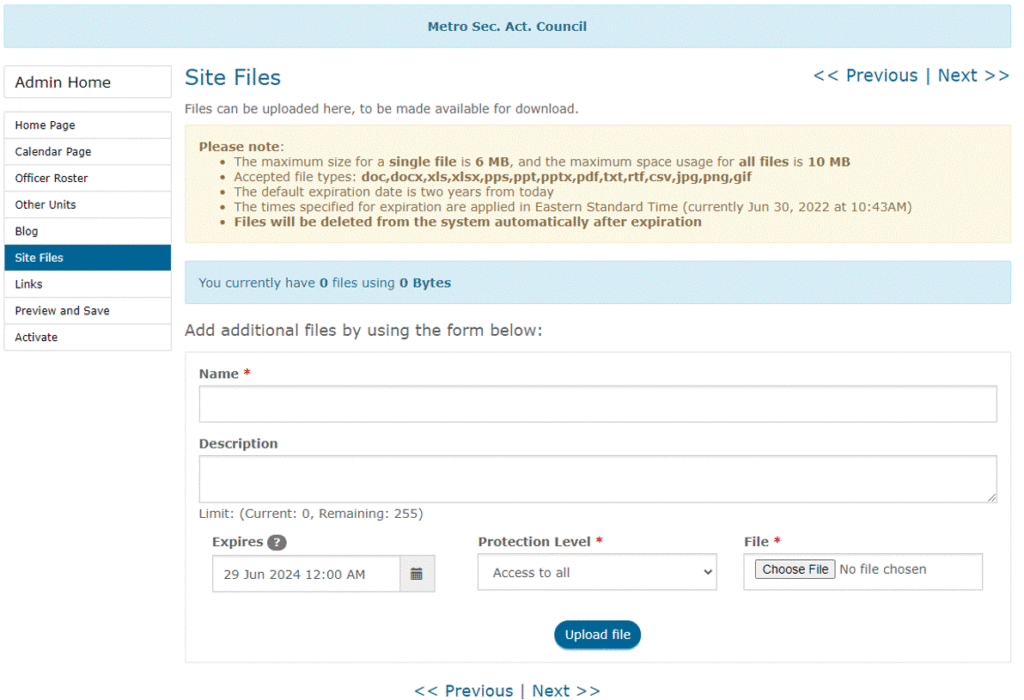
Click “Next >>” to advance to the next screen.
Links Page
WebInABox will automatically include links to the IEEE Main site, IEEE Benefits, Join, Renew, and the IEEE Memberships and Subscriptions Catalog. You can add more links to this page as desired.
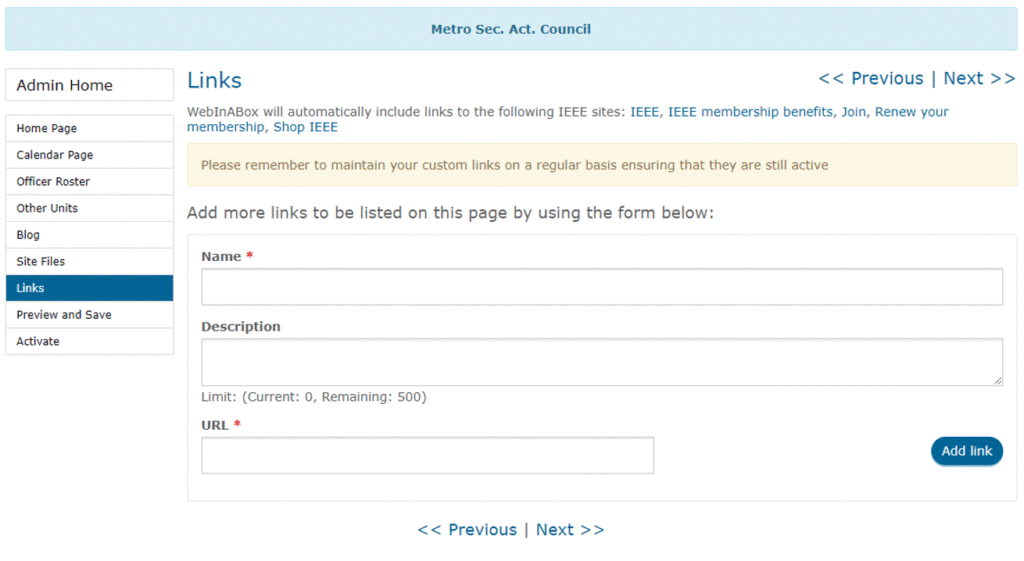
Click “Next >>” to advance to the next screen.
Save and Preview
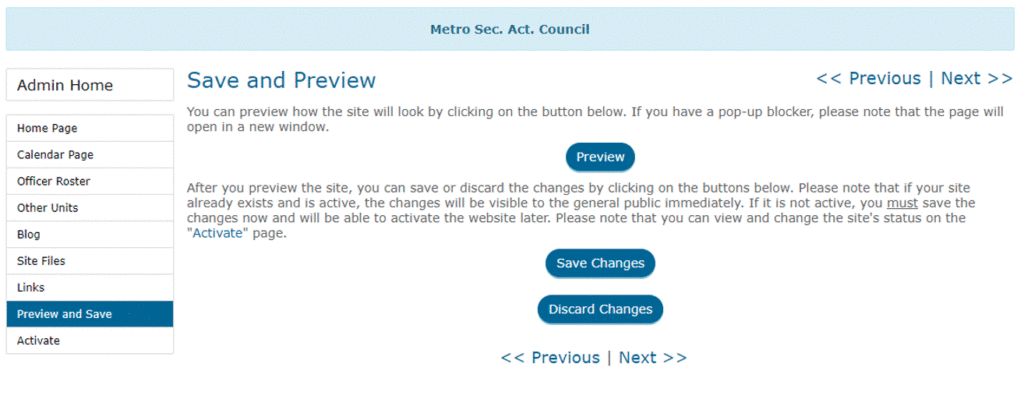
Before publishing your site, you can click the “Preview” button to see what it will look like. You can always navigate back to any of the pages above to make edits, if needed.
If you are happy with your site, click the “Save Changes” button. Then, click “Next >>” to advance to the next screen which will activate your new site.
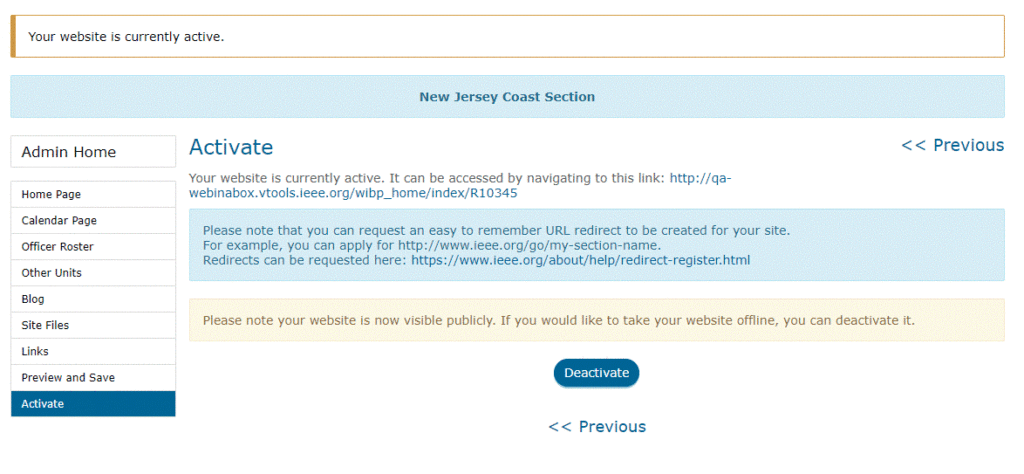
Congratulations! Your site is now live and active. The “Activate Screen” will give you the URL for your new site. You can always navigate back to any of the pages above to make edits, if needed. Or, if you want to remove your site, click the “Deactivate” button.
Editing an Existing Site
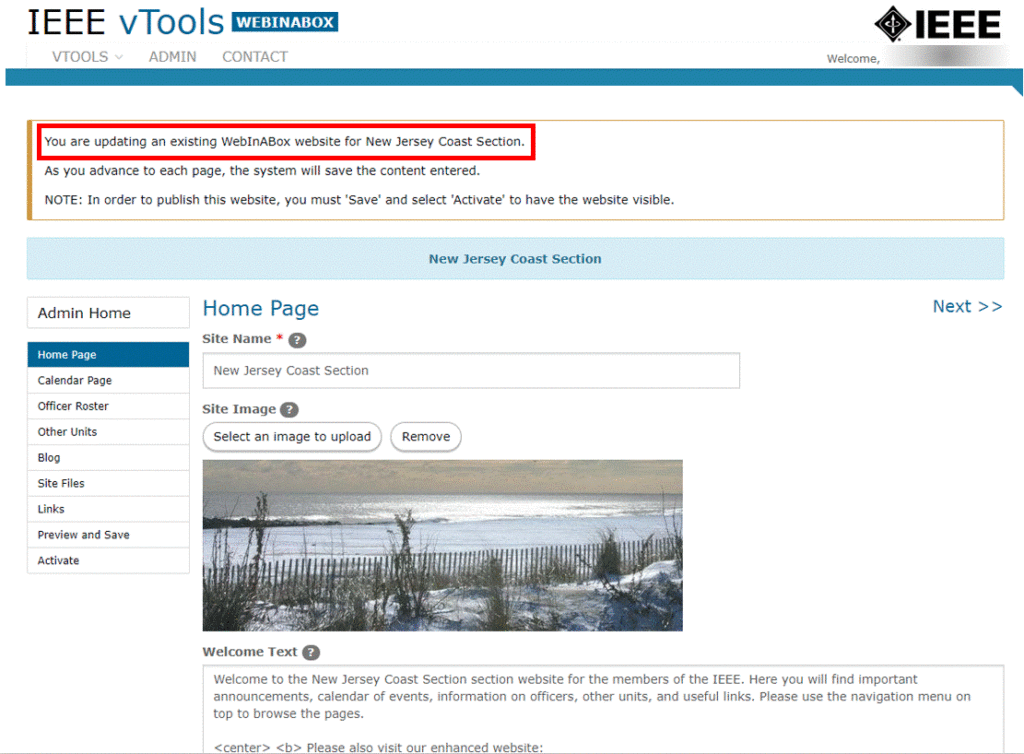
Follow the same steps as listed above, but be sure that the page shows that you are updating an existing site, versus creating a new one:
Navigate through the pages you wish to update, then go to the Save and Preview page.
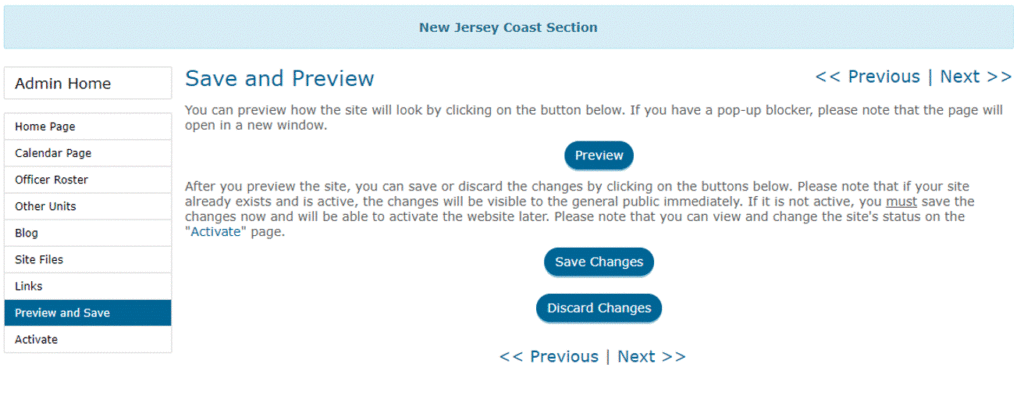
Here, you can preview the site before publishing. If you are happy with the changes, click the “Save Changes” button. Then, click “Next >>” to advance to the next screen which will activate the changes to your site.
